Blog Archives
Honey, I Want Honey Wheat Bread
A friend asked me if I had a bread recipe similar to the bread served at a large chain restaurant. Having only eaten at the restaurant two or three times and it’s been quite a while since the last time. I researched copycat recipes to see what the possible ingredients were and determined it is a whole wheat bread. I had a great starting place with my whole wheat bread recipe, and with a couple of tweaks, I came up with,
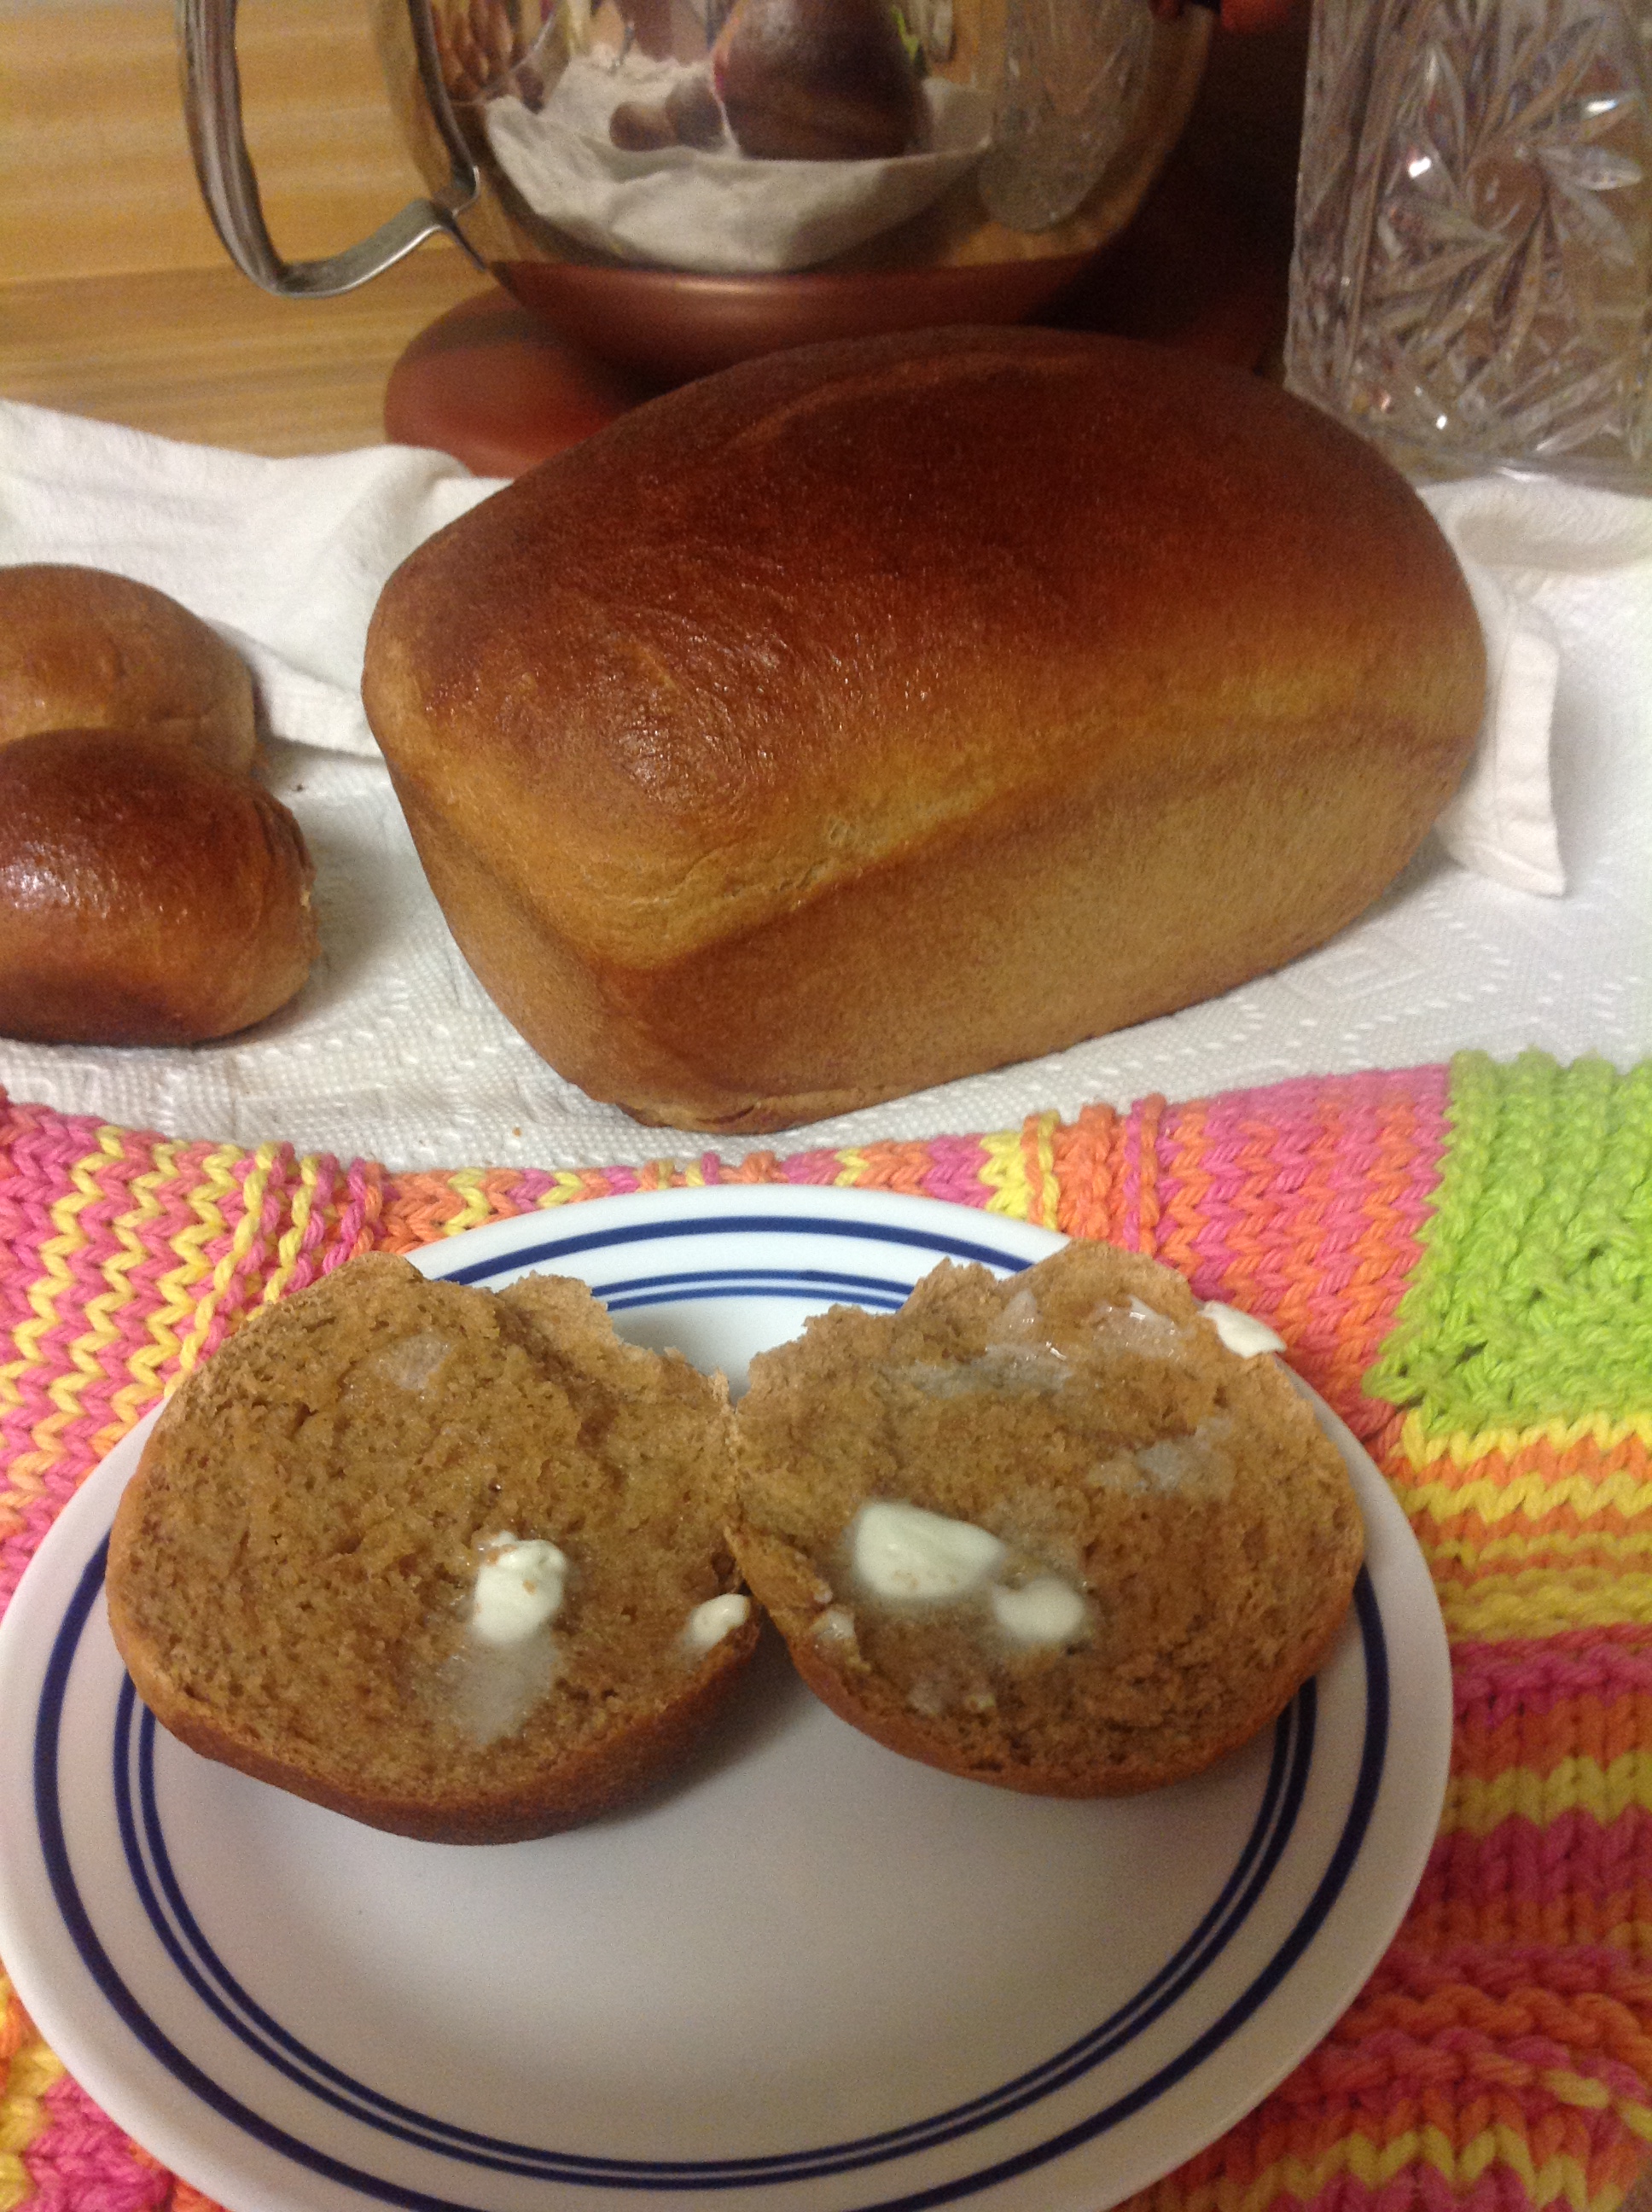
Honey-I want Honey Wheat Bread
Honey Wheat Bread
Ingredients:
1-1/2 cups very warm water
4 Tablespoons rapid rise dry yeast (I use Saf-instant brand)
1/3 cup olive oil
1/2 cup molasses
3 eggs (room temp and beaten)
2/3 cup honey
1/4 cup gluten
2 Tablespoons cocoa powder
3 cups whole wheat flour
6-8 cups whole wheat flour (in addition to the three)
1 Tablespoon baking powder
2 teaspoons salt
4 Tablespoon cider vinegar
Honey Butter Egg wash ingredients:
1 large ROOM TEMPERATURE egg white
1 Tablespoon of honey
2 Tablespoons melted butter cooled (don’t want to cook the egg white)
INSTRUCTIONS:
In your mixer bowl (or a large mixing bowl) combine first nine ingredients It’s OK, really. Just throw the yeast and everything right into the bowl. Now run the mixer (Paddle attachment) just until the ingredients come together. Then let it stand until it’s bubbly and double in size. (This takes approximately 30 minutes)
After the mixture has doubled, in a small bowl combine the baking powder, salt and vinegar. This gets good and foamy. Immediately add it to the yeast starter mixture and start your mixer.
Add 7 to 8 cups of whole wheat flour one cup at a time. Don’t add more than a cup at a time, otherwise you will have flour EVERYWHERE. Take it slow and don’t add too much. You want the dough to still be slightly sticky.
Once the dough has formed a ball in the bowl, you can either run the dough hook for 3 minutes to knead, or go all pioneer and turn it out on a floured surface an knead for 4 minutes. Add additional flour sparingly because you still want a slight tack when you make your loaves or dinner rolls. It forms easier and smoother when the dough is slightly sticky.
Place dough into a large greased bowl and cover. Let it rise aproximately 30 minutes or until doubled in size. Punch it down, cover and rise a second time. Start your oven (see last line) now to be sure it’s heated. The warm stove top helps the bread rise after you cut into loaves.
Punch down after second rise, then cut into 4 loaves. I go all kitchen nerd here and use a kitchen scale so the loaves are uniform in size. Place the loaves in greased loaf pans. You can also make pull apart dinner rolls. Probably use two 9×13 cake pans.
Whisk together the honey butter egg wash ingredients and brush the tops of the loaves or rolls with with the mixture.
Bake 30 minutes at 370 degrees in glass pans or 375 degrees in metal pans or until loaves or rolls are deep brown.
Turn the loaves out onto a clean dish towel and allow to cool completely before bagging up for storage. You don’t want your loaves to sweat which makes your bread soggy.
~*~*~*~*~*~
What people ask about the most:

Pyrex Easy Grab Loaf Pan

Bob’s Vital Wheat Gluten

Share this:

Simple Scrumptious Sourdough

For those of you paying attention, I have been in pursuit of the perfect sourdough bread recipe. A weekend stuck inside due to an early huge snowstorm had my mind back on sourdough. My sourdough starter was to the point it needed to be reduced so rather than toss it, I decided to go back to the drawing board and come up with a new sourdough recipe.
The sourdough recipe I have is really tasty. It has the perfect tang, but it takes ALL DAY from the drop of the first ingredient until the loaves are out of the oven. It relies exclusively on the sourdough starter to raise the dough and that takes a long time. My Mom’s bread recipe is the absolute best homemade white bread ever. It’s soft, it rises to heights previously unknown to homemade bread, and it is delicious. The task became, how do I hybrid these two recipes into a fast, delicious sourdough bread recipe.
I’m sure you’ve guessed, since this posts exists, I accomplished this feat. The bread is so tasty, crustier than Mom’s bread (as sourdough should be), and softer, lighter than the sourdough recipe and the most important? It’s a tall, beautiful loaf.
I made my loaves in glass loaf pans, so at this point I’m not sure how free form traditional style loaves will turn out. I’m thinking they should be just fine. I also didn’t score my loaves, but this can be done as well to create your own unique loaves either in pans or free form.
Now, I’m going to get on my soapbox. To achieve a good rise and quality dough and bread, always use good quality flour. In my opinion store brand and Gold Medal flours are subpar. Mad Scientist uses Dakota Mills, Wheat Montana or King Arthur flour.
Simply Scrumptious Sourdough
INGREDIENTS:
- 1 Cup of sourdough starter
- 1 Lightly beaten egg
- 2 Tablespoons honey
- 1 Cup very warm water
- 1-1/2 Cups AP flour
- 2 Tablespoons gluten
- 2 Tablespoons yeast
- 1-1/4 teaspoons salt
- 5/8 teaspoon sour salt
- 1 teaspoon baking powder
- 1 Tablespoon white vinegar
- 3-4 cups AP flour
DIRECTIONS:
Combine the first SEVEN ingredients (starter through yeast) into your mixer bowl, and mix using paddle attachment just until the ingredients come together. It should be a shaggy mixture. Let this starter dough rest for 30 minutes or until the mixture rises approximately double.
After the starter dough has raised, in a small bowl stir together the next FOUR ingredients (salt through vinegar) and add immediately to the starter dough and start your mixer on low-medium speed.
Add flour 1/2 to 1 cup at a time and switch to the dough hook when the dough becomes extra thick and sticky. Continue to slowly add flour until dough is slightly sticky. Knead using your mixer with the dough hook for 5 minutes. Then turn onto a floured surface and knead by hand for another 2 minutes.
Preheat oven to 375° and place a baking pan with 1/2” of water added on the bottom rack.
Move dough to a clean, oiled bowl and cover. Allow the dough to rise 30 minutes, or until doubled. Punch down, cover and rise another 30 minutes, or until doubled.
Divide the dough into two loaves and place into oiled loaf pans. Cover and allow to rise for 30 minutes.
Bake for 15 minutes then remove the pan of water. Bake for an additional 15 minutes or until the loaves are golden brown.
Share this:

*Sourdough Starter
For those interested in homemade sourdough, this is the process I used to get mine going. I used pineapple juice to start mine and the resultant starter is wonderfully tangy. I recommend not using the starter for two weeks after starting. The longer it is fed, the better the quality of taste. I made a batch of bread 8 days after I began. It was good, but the bread I made a month after was even better.
Once I got my starter going, I let it grow in quantity until I have 3-4 cups in my canister. I either bake, give away, or discard 1 cup when it gets to be over this amount. The giveaway option is a wonderful gift to friends who love sourdough because they won’t have to go through the time it takes to get their own batch going. They will simply need to feed one day, 1 cup of flour and 1/2 cup of water to have enough to make a batch of bread the next day.
To maintain my starter, I feed daily, 1/4 to 1/2 cup of flour and 2 Tablespoons to 1/4 cup of water. Honestly, I don’t measure either the flour or the water. I “eyeball” the amounts.
Many of the sourdough people only keep a cup or less on hand. I like to have the larger amount because it’s easier to measure out what I need to use, and I have plenty leftover to keep the starter going.
I found this recipe on “The Fresh Loaf” from Debra Wink’s Sourdough starter. It is below, as I found it on the site.
Basic Procedure for Making Sourdough Starter
If you are the curious, investigative type (or a sourdough purist :-), this can be done with just water in place of the juice throughout. But for many (not all), a vigorous gas-producing bacterium will grow on day 2 and quit growing on day 3 or 4, followed by a few days or more of agonizing stillness. The fruit juice or cider should keep this bacteria (and a few others that are smelly) from growing and delaying the process. Either way, the end result will be the same sourdough starter.
* Mad Scientist note: use good quality flour for your starter and your bread. In my opinion store brand and Gold Medal flours are subpar and your resultant starter and bread do not perform as good. Mad Scientist uses Dakota Mills, Wheat Montana or King Arthur flour
Day 1: mix . . .
2 T. whole grain flour* (rye or wheat)
2 T. unsweetened pineapple juice, apple cider or orange juice
Day 2: add . . .
2 T. whole grain flour*
2 T. juice or cider
Day 3: add . . .
2 T. whole grain flour*
2 T. juice or cider
Day 4: (and once daily until it starts to expand and smell yeasty), mix . . .
2 oz. of the starter (1/4 c. after stirring down–discard the rest)
1 oz. flour** (scant 1/4 cup)
1 oz. water (2 tablespoons)
Share this:

Almost Mad Sourdough

Almost Mad Sourdough
Ingredients:
- 4-6 cups unbleached AP flour
- 2 1/2 teaspoons salt
- 1 tablespoon quick/rapid rise yeast
- 1/2 teaspoon sour salt
- 3 tablespoons honey
- 1 cup warm milk
- 2 tablespoons olive oil, softened
- 1 1/2 cups sourdough starter (see HERE for instructions)
- 2 large eggs (one for dough-one for egg wash)
- Sea salt or Kosher Salt
Directions:
- In a large bowl, combine 1 cup flour, salt, and dry yeast. Stir in milk, honey, softened butter and 1 lightly beaten egg. Add starter and sour salt. Mix in flour gradually. Dough should be still be sticky. ((Not glob to your fingers sticky)
- Turn dough out onto a floured surface, and knead for 8 to 10 minutes. Yes, you read that right. Is necessary to obtain the proper texture of your baked bread. Or let your machine do the work for you. 5-10 minutes in a large mixer (Kitchenaid or Cuisinart stand)
- Place in a greased bowl, turn once to oil surface, and cover. Allow to rise until doubled in volume.
- Punch down, and let rest 15 minutes. Shape into two loaves. (Round or oblong for artisan loaves or use greased loaf pans) Place on a greased sheet pan. Allow to rise 30 minutes to an hour or until doubled.
- Score the loaves, diagonal, lengthwise, crosswise, hashtag; whatever you like. Brush egg wash over tops of loaves and sprinkle tops with a little Sea or Kosher Salt.
- Bake at 400 degrees F (190 degrees C) for 25-30 minutes, or till done golden brown. Sift a small amount of flour on loaves for that beautiful sourdough finishing touch.
**NOTE– Sourdough starter takes around two weeks to prepare for use. The link to the blog Yumarama.com is a very concise set of instructions on preparing a starter. I wish I had found this before I started mine. Much easier and More understandable. For family here in town, I can save you the time of starting your own by sharing the starter I ladle off every other day or so to prevent a sourdough starter takeover.
Share this:

Who Want’s Whole Wheat? Bread

Loaves and dinner rolls. Mmm, mmm, GOOD!
In my last post, I shared my Mad Scientist Momma’s bread recipe. It is so good and I really wanted to have a whole wheat version that would be equally as good so I set about adapting my Mom’s already awesome recipe.
Whole wheat, homemade, has a tendency to be heavy and dense and just “OK”. What I came up with is really good. I’m bragging and stating a fact. Mom gave me good “bones” in her recipe so making a few changes here a tweak there was easy and obvious.
I have a Kitchen-Aid stand mixer which is really a great tool for making this bread. Any good stand mixer with a big enough capacity bowl will do the job, or you can go old school and use a hand mixer until you start adding flour to stiffen up the dough.

~~~~~~~~~
Who Wants Whole Wheat? Bread
Ingredients:
- 3 cups very warm water
- 4 Tablespoons rapid rise dry yeast
- 1/3 cup olive oil
- 1/3 cup molasses
- 3 eggs (room temp and beaten)
- 1/3 cup honey
- 1/4 cup gluten
- 3 cups whole wheat flour
OPTIONAL–To make heartier denser bread add a 1/4 cup of wheat germ or use:
- 1 cup bulgur wheat
- 1 cup boiling water
In a small bowl, pour boiling water of bulgur, stir and let stand at least 5-10 minutes. Drain any excess water.
In your mixer bowl (or a large mixing bowl) combine all ingredients (including bulgur if you are using that option) . It’s OK, really. Just throw the yeast and everything right into the bowl. Now run the mixer (Paddle attachment) just until the ingredients come together. Then let it stand until it’s bubbly and double in size. (This takes approximately 20 minutes)
After the mixture has doubled, in a small bowl combine:
- 2 teaspoon baking soda
- 2 teaspoons salt
- 3 Tablespoon cider vinegar
This gets good and foamy. Immediately add it to the yeast starter mixture and start your mixer. Then, add 7 to 8 cups of flour one cup at a time. Take my word for this, you don’t want to add a bunch all at once, otherwise your mixer will go all Mad Scientist on you and you’ll have a whole wheat kitchen if you don’t take it slow.
Add flour until the dough is still pretty sticky. Turn the dough onto a floured surface and knead for 3 minutes. Add additional flour sparingly. This dough forms much better if it’s still a little sticky when you are done kneading.
Place dough into a large greased bowl and cover. Let it rise aproximately 30 minutes or until doubled in size. Punch it down, cover and rise a second time. Start your oven (see last line) now to be sure it’s heated. The warm stove top helps the bread rise after you cut into loaves.
Punch down after second rise, then cut into 4 loaves. I go all kitchen nerd here and use a kitchen scale so the loaves are uniform in size. Place the loaves in greased loaf pans. You can also make pull apart dinner rolls. Probably use two 9×13 cake pans.
Bake 25 minutes at 365 degrees in glass pans or 375 degrees in metal pans.
Now go get a stick of REAL butter and slather a slice up and enjoy.

